
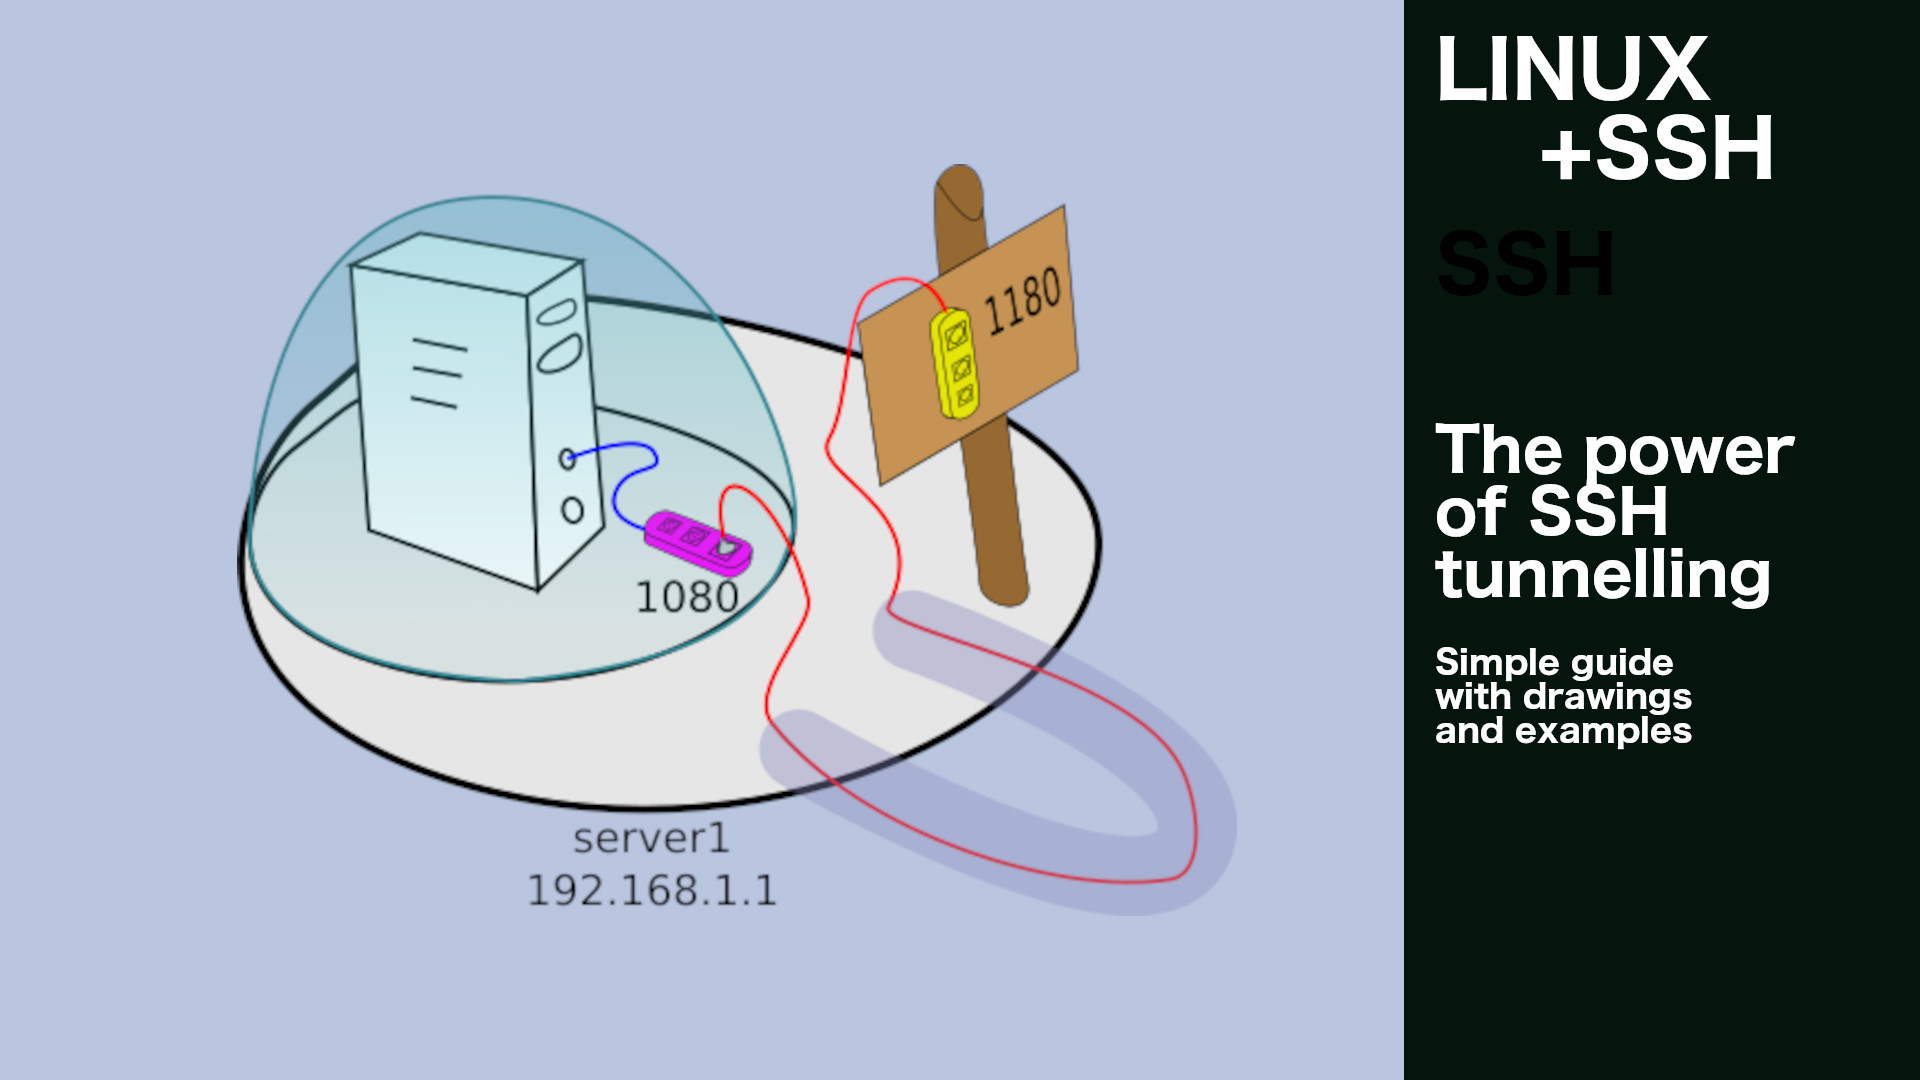
SSH tunnelling is about making a two-way secure connection between two servers using SSH. Though it sounds innocent, it gives you powerful capabilities. Starting from the simplest tunnels, along with delving into the subject, we will go through the more advanced ones.
1. Communication channel encryption
Imagine a situation in which we are implementing some client-server software. An already existing solution requires the encryption of communication between the client and the server. So let’s think about it for a moment … What can you do in this situation?
If the software allows it, you can of course configure the encryption – thus securing the communication channel.
And what if the creator of the software did not think about the possibility of encrypting communication? So… If you have access to the source code, you can implement encryption directly in the software. However, you do not always have such an opportunity, and the implementation of such encryption alone does not have to be easy.
1.1. Using port forwarding to secure the communication channel
An alternative is to use the SSH tunnel (which is encrypted just out of the box)
and then redirect client-server traffic through it. The solution is simple, cheap and worth considering.
So let’s assume that the server listens on localhost port 2080.
To use SSH to secure the communication channel, we can open the 1080 port on the client machine, from which the traffic will be redirected, through an encrypted SSH connection to the server port 2080. For this purpose, you can use the following command:
ssh -nNT -L 1080:localhost:2080 user@server
The above command should be read as follows:
- ssh user@server – open SSH connection to user@server
- -nNT – set additional options to disable/block unnecessary ssh functions that are not used when port forwarding. It is also worth using them for security reasons.
- -L 1080:localhost:2080 – corresponds to the command -L localhost :1080:localhost:2080 – on the machine where I run the ssh command open the 1080 port on the localhost interface (Note: in this case the interface localhost is not explicitly specified in the command). At the moment of connection to this port, let the server I am conecting to (server) open the connection to localhost port 2080 and redirect incoming and returning traffic there.
2. Examples of using port forwarding
The use of SSH tunnelling for port forwarding can cause some problems, especially for people who are just beginning their adventure with the linux world. Therefore, I decided to discuss some basic configurations of tunnels, the knowledge of which can save you a lot of time in the future.
In the following part of the article, we will basically use two port forwarding modes -L and -R. In the drawings I have marked with yellow the ports that are being opened and purple with the ports on which the traffic is being redirected.
The ssh -L port1:adressIP:port2 user@server command should be read as below:
- ssh user@server – open SSH connection to user@server
- -L port1:adressIP:port2 – on the machine where I run the ssh command open port1 (yellow) on the localhost interface. During connection to this port, let the server to which I am conection to (server) open the connection on the adressIP port2 and redirect incoming and returning traffic there.
The ssh -R interfaceIP:port1:adressIP:port2 user@server command should be read as below:
- ssh user@server – open SSH conenction to user@server
- -R interfaceIP:port1:adressIP:port2 – on the remote machine (to which I am connecting), open port1 (yellow) on the interfaceIP. During connection to this port, let the SSH client (the machine on which I run the ssh command) establish the connection on adressIP port2 (purple) and it routes there the traffic from the remote server port (2180)
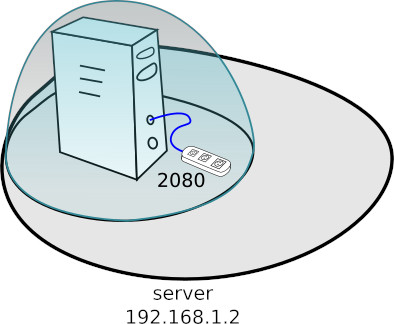
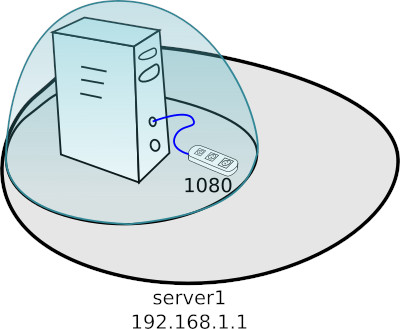
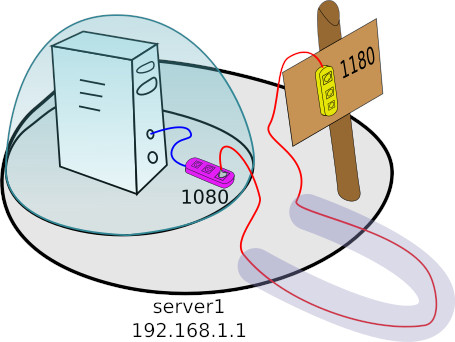
2.1. Port forwarding within one machine
Suppose you have an http server listening on port 1080 on the localhost interface. In this configuration, we can not easily access to the server from the outside. The simplest situation can be illustrated as below – that is, everything that is listened on the internal interface is like under a glass dome and you can get to it only from within.
Let’s assume that we can not change the server configuration, and yet we would like to be able to access to it from outside. The following command may be very helpful to achieve the goal:
ssh -nNT -L 192.168.1.1:1180:localhost:1080 user@localhost
As a result of the above command, on the server interface 192.168.1.1 on which we execute the command, the port 1180 will be opened. Then all traffic from it will be redirected to the 1080 port of the localhost interface of the server to which we connect (localhost).
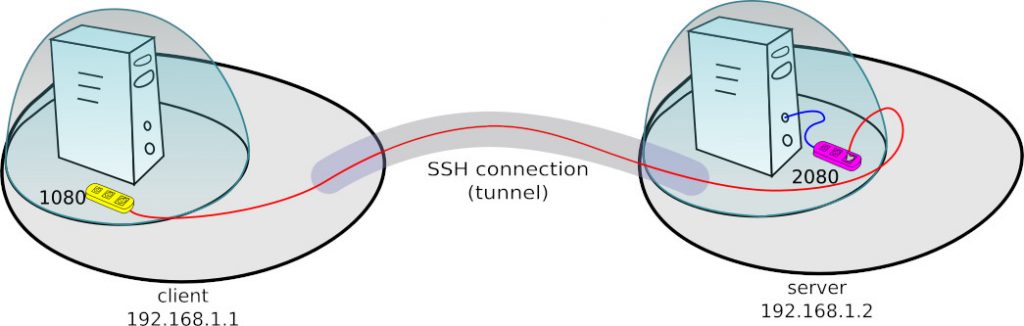
2.2. Port forwarding to a remote server
It’s time to complicate the problem a bit. Suppose you want to redirect the local server’s 1080 port (server1) to the public interface of another server (server2). This situation can be illustrated like below:
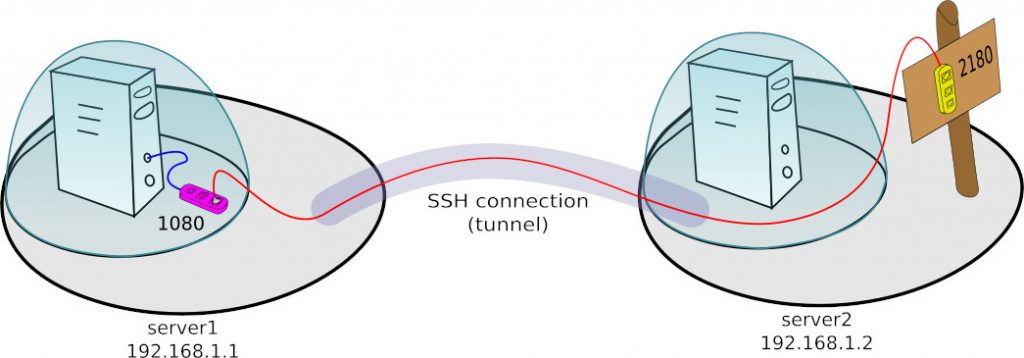
In this case, we can also use the SSH tunnel, but slightly differently made.
ssh -nNT -R 192.168.1.2:2180:localhost:1080 user@server2
The above command should be read as follows:
- ssh user@server2 – open SSH connection to user@server2
- -nNT – set additional options to disable/block unnecessary ssh functions that are not used when port forwarding. It is also worth using them for security reasons.
- -R 192.168.1.2:2180:localhost:1080 – on the remote machine to which I connect, open port 2180 on the 192.168.1.2 interface. During connection to this port, let the SSH client (server1) connect to localhost 1080 and redirect traffic there from the remote server port (2180) .
Remember to change the parameter value in the /etc/ssh/sshd_config file, which allows the port to be exposed to the public interface depends on SSH tunnel command.
GatewayPorts clientspecified
For an open port to listen on all interfaces, just enter wildcard (*) instead of the specific address.
ssh -nNT -R *:2180:localhost:1080 user@server2
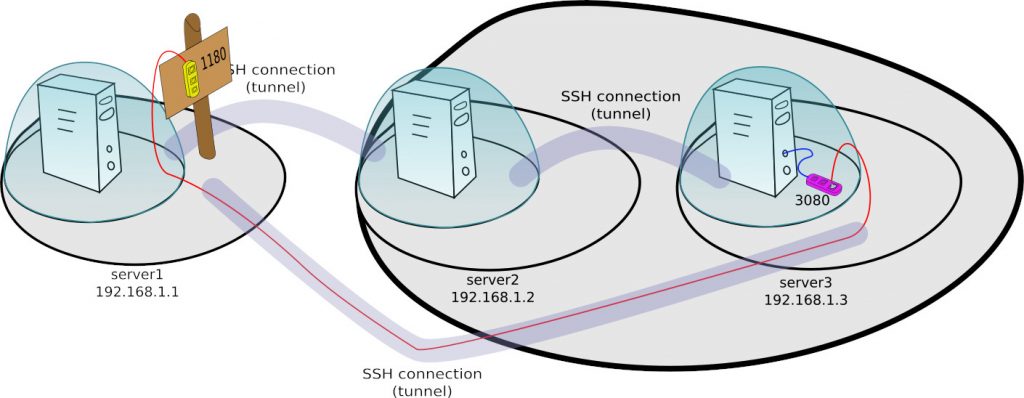
2.3. Tunneling to the server inside the NAT
Another and quite common use of SSH tunnelling is redirection of the server port behind NAT to the local port of our server. Consider cases where the port you want to redirect from the server inside NAT only listens on the private interface and where it is public.
2.3.1. Tunnelling of the port exposed on the private interface of the server behind NAT

In the above example, first you need to get to NAT using the server2 server, then connect to server3, to finally set up the connection with server1 with the appropriate port forwarding.
ssh user@server2
ssh user@server3
ssh -nNT -R 1080:localhost:3080 user@server1
We may also want to establish a reverse connection to port 1180 exposed on the public interface of server1. To do this we have to modify the ssh command to the following form. Remember to change the GatewayPorts parameter, as described earlier.
ssh user@server2
ssh user@server3
ssh -nNT -R 192.168.1.1:1180:localhost:3080 user@server1
Then our tunnel will look like this:
2.3.1. Tunnelling of the port exposed on the public interface of the server behind NAT
In a case where port 3180 of server3is available from server2 server, the matter is simplified considerably.
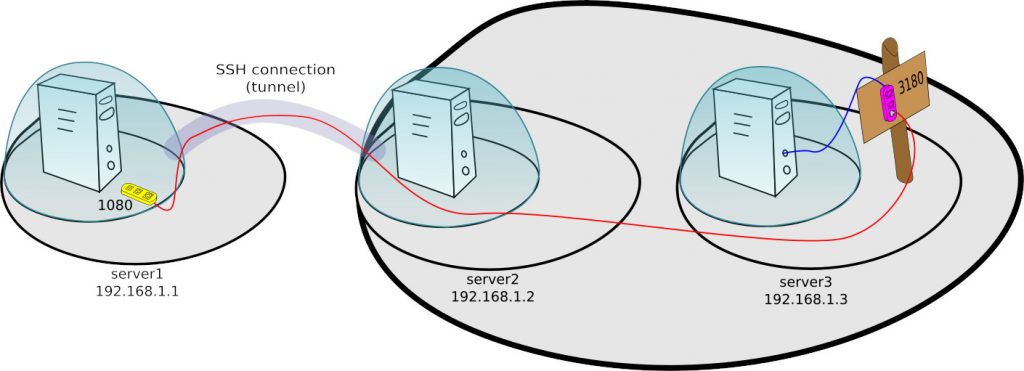
In this case, you can use the variant -L discussed earlier, which will take the form
:ssh -nNT -L 1080:192.168.1.3:3180 user@server2
The above command should be read as follows:
- ssh user@server – open SSH connection to user@server2
- -nNT – set additional options to disable / block unnecessary ssh functions that are not used when port forwarding. It is also worth using them for security reasons.
- -L 1080:192.168.1.3:3180 – on the machine where I run the ssh command open the 1080 port on the localhost interface. During connection to this port, let the server I log on to (server2) open the connection on 192.168.1.3 port 3080 and redirect incoming and returning traffic there.
3. SOCKS 5 Proxy
Browsing the Internet, especially in unverified networks, we can not be sure that the data we send is not spied. In particular, if the site uses the http protocol instead of SSL encryption (https). One of the solutions to the problem described is the VPN. However, the situation does not always allow you to make this type of connection.
An alternative might be to use the SSH tunnel to a trusted server and Socks Proxy. The following command creates the local server SOCKS 5 for listeners on port 5000.
ssh -D 5000 -nNT user@server1
Now all you have to do is set the localhost:5000 proxy in your browser, remembering to select the SOCKS 5 option.
That’s all what I’ve prepared for you in this tutorial, if I helped you, please consider sharing this post to help me gain a wider audience.
Thanks and I hope to see you in my next tutorial.